Unlock Disabled iPhone
iPhone gets temporarily disabled when you enter an incorrect Passcode multiple times to unlock the device. If more incorrect password attempts are made, it gets permanently disabled. This security feature is designed to prevent unauthorized access to your Lost or Stolen iPhone and prevent anyone from trying to guess the Lock Screen Passcode on your device. Once iPhone gets permanently disabled, the only way to gain access to your device is to Erase its Lock Screen Passcode, which can only be achieved by erasing the entire data on your device. After the Lock Screen Passcode is erased, your iPhone won’t be prompting you to enter the Password and you will be able to gain access to your device. You will find below, different methods to Unlock Disabled iPhone by erasing its Lock Screen Passcode.
1. Unlock Disabled iPhone Using iCloud
If you had previously enabled Find iPhone feature on your device, you will be able to erase the Lock Screen Passcode and unlock your disabled iPhone using iCloud.
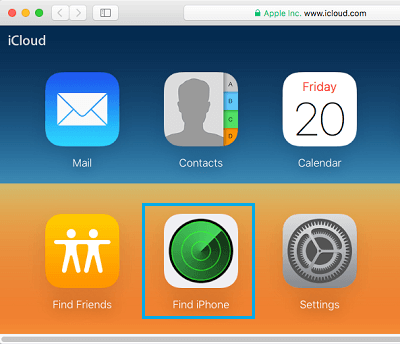
Visit iCloud.com on your computer and sign-in to your iCloud Account. 2. Once you are in iCloud, click on Find iPhone icon.
When prompted, Sign-in using your Apple ID Password. 4. On the next screen, click on All Devices option and select the iPhone that you want to Erase.
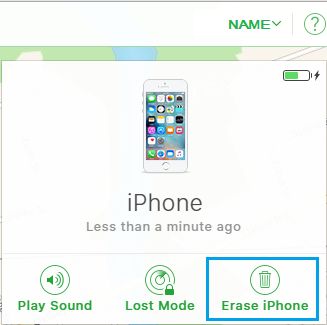
On the next screen, click on Erase iPhone option.
On the confirmation pop-up, tap on the Erase option to confirm.
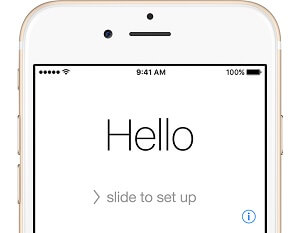
Once the data on your iPhone is erased, you will see your iPhone starting with the Hello Screen.
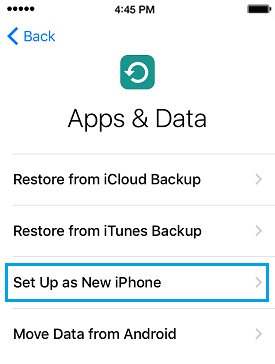
Follow the on-screen instructions, until you reach ‘Apps & Data’ Screen and select Set up as New iPhone option.
9. Follow the remaining on-screen instructions to complete the setup process and set a New Passwcode for your device.
2. Unlock Disabled iPhone Using Recovery Mode
Make sure that you have the latest version of iTunes installed on your computer (Mac or Windows PC) and follow the steps below to Reset or Remove Passcode from iPhone.
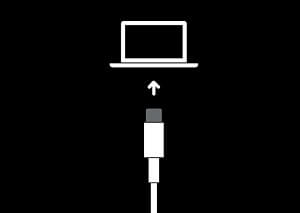
- Connect iPhone to computer using its charging cable.
- Open the Finder on your Mac (macOS Catalina or higher). If you are using an earlier version of macOS or Windows PC, Open iTunes (If iTunes is already open, close iTunes and open it again).
- Next, follow the steps below to enter Recovery Mode as applicable for your model of iPhone. iPhone 8 and later: Press and release Volume UP button > Press and release Volume Down button > Next, Press and hold the Side button (Power Button), until you see the Recovery Mode screen. iPhone 7/7 Plus: Press and hold the Side and Volume Down buttons at the same time. Keep holding them, until you see the Recovery Mode screen. iPhone 6 or earlier: Press and hold Home and Side (Power) buttons at the same time. Keep holding them, until you see the Recovery Mode Screen (iTunes Logo and Cable)
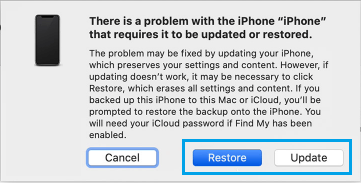
Note: Do not release the button as you see iPhone starting with Apple Logo. Continue holding down the button, until you see Recovery Mode Screen. 4. Restore iPhone Using iTunes Once your device enters recovery mode, you will see a pop-up allowing you to either Update or Restore your device.
Since, you are trying to Erase the Passcode, select the Restore option. Patiently wait for your computer to download the lateset version of iOS on your device. If the download is taking longer than 15 minutes and your device exits recovery mode, allow the download to finish and repeat step 3. 5. Setup iPhone Using Backup or As New Device After the Restore process is completed, you will find iPhone starting with the ‘Hello’ screen.
Follow the on-screen instructions, until you reach ‘Apps & Data’ Screen and select Set up as New iPhone option.
Follow the remaining on-screen instructions to complete the setup process and set a New Passwcode for your device.
3. Unlock Disabled iPhone Using DFU Mode Restore
If you are unable to put iPhone in Recovery Mode, you can try to Unlock iPhone using DFU Mode. DFU Mode will erase all the data on your iPhone, including its Lock Screen Passcode and provide you with the option to restore your device as New iPhone. The steps to put iPhone into DFU Mode vary, depending the model of your iPhone and can be found in this guide: How to Enter DFU Mode on iPhone.
How to Restore Deleted Apps on iPhone and iPad How to Change Apple ID On iPhone or iPad