Turn OFF Login Password in Windows 10
While having a Login Password ensures the security of files on your computer, you may have your own reasons for disabling the requirement to enter Login Password on your computer. For example, you may want to make it easy for kids and your guests to access the computer by allowing them to Login without entering any Password. Also, some users temporarily disable the Login Password during busy periods, in order to gain quicker access to the computer during busy periods. You will find below the steps to Disable or Turn OFF Login Password in Windows 10 for both Local and Microsoft User Accounts on your computer. Note: Turning OFF Windows 10 Password can make your device vulnerable to Local and remote unauthorized access.
1. Turn OFF Local User Account Password in Windows 10
If you are using a Local User Account, you can follow the steps below to Disable the Login Password on your computer.
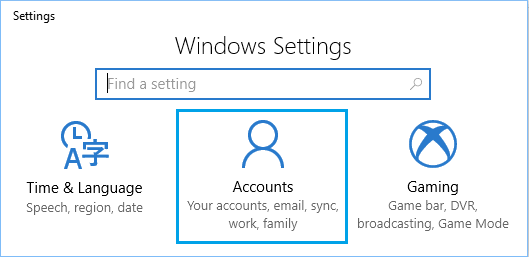
Open Settings on your computer and click on Accounts.
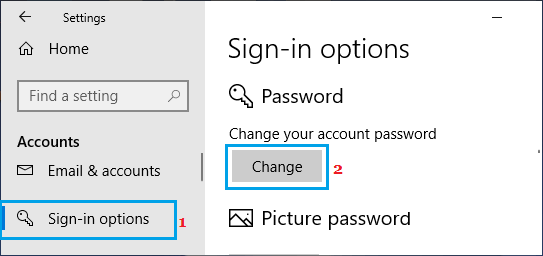
On the Accounts screen, click on Sign-in options in the left pane. In the right-pane, scroll down and click on the Change button located under Password section.
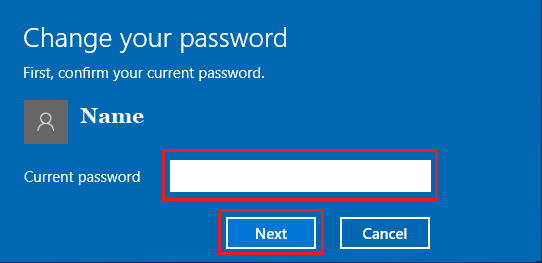
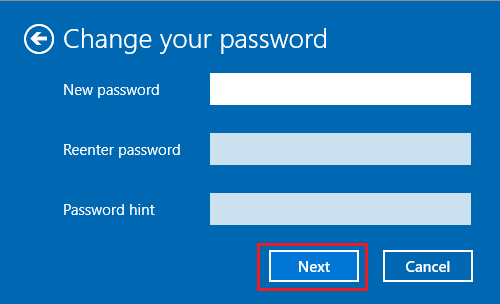
On the next screen, type your current User Account Password and click on Next.
On the next screen, do not enter anything and click on Next to totally skip the Password setup process.
Finally, click on the Finish button.
Once you complete above steps, you will no longer require a password to login to this particular Local User Account on your computer.
2. Disable Microsoft User Account Password in Windows 10
If you are using Microsoft User Account, you won’t be able to Disable the Login Password as your credentials are linked to your online Microsoft Account. In this case, you will have to switch to a Local User Account and skip the password setup process on the Local User Account screen.
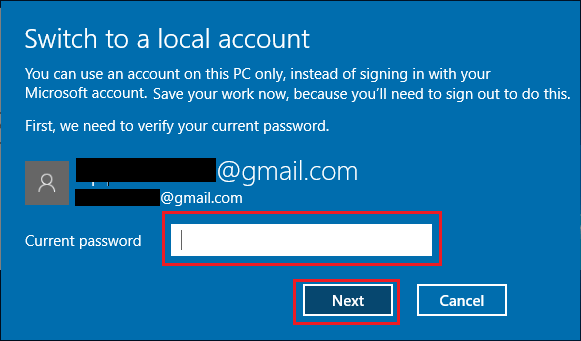
Go to Settings > Accounts > click on Your Info in the left pane. In the right-pane, click on Sign-in with a local account instead link.
When prompted, enter your current Microsoft Account Password and click on Next.
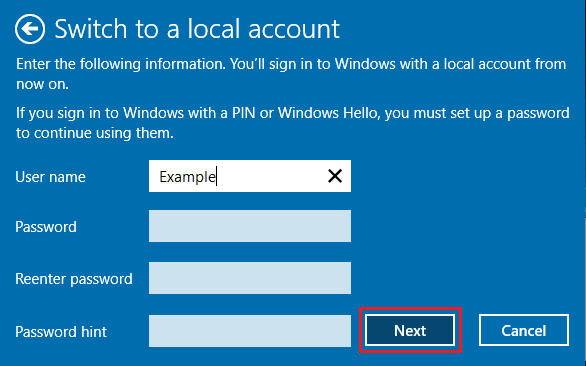
On the next screen, do not enter any Password and click on Next to skip the password creation step.
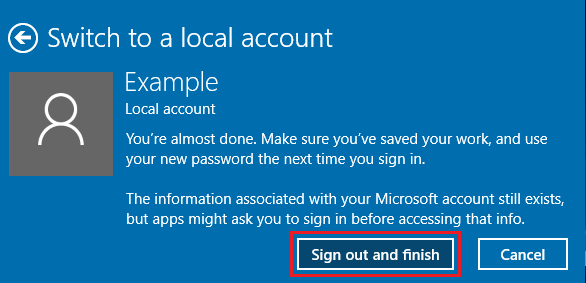
Click on Sign Out and finish button.
After this, your computer will no longer be associated with your Microsoft Account and there won’t be any need to enter the Login Password to access your computer.
How to Create Password Reset Disk in Windows 10 How to Change User Account Type in Windows 10