Enable Game Mode in Windows 10
Introduced in the Creators Update (V1703), Game Mode feature in Windows 10 is designed to provide gamers with superior gaming experience on a Windows computer. Once Game Mode is enabled in Windows 10, it can be activated at any time by pressing Windows + G keys on your computer or by pressing the Xbox button on your controller. When Game Mode is activated, it frees up CPU, GPU and other resources on your computer for gaming by stopping all non-essential Apps and services on your computer. With Game Mode being available in Windows 10, there is really no need to use any Third Party Tools or Game Play boosters on your computer.
1. Steps to Enable Game Mode in Windows 10
In general, Game Mode should be enabled by default on your computer. To make sure, you can follow the steps below to check and Enable Game Mode in Windows 10 (if it is not enabled).
Click on the Start button and then click on the Settings Icon.
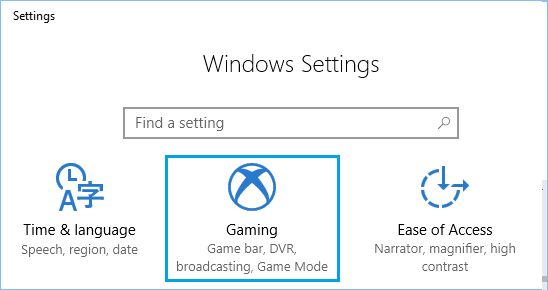
On the Settings Screen, click on Gaming.
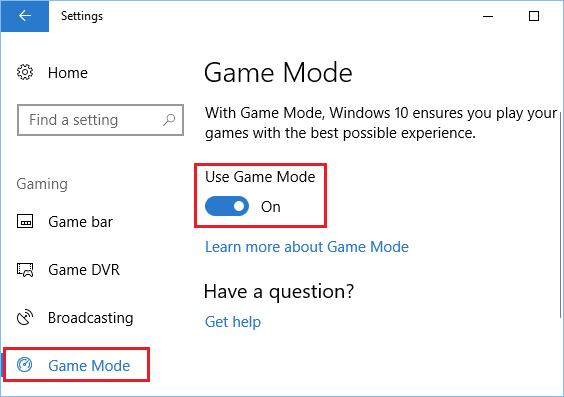
3. On the next screen, click on Game Mode and toggle ON Use Game Mode option.
Note: In case you cannot find Game Mode, make sure that your computer is using the latest update of Windows 10 (V1703 or later).
2. How to Use Game Mode in Windows 10
Once Game Mode is enabled, it can be activated at any time on your computer by following the steps below.
Open any Video Game on your Computer.
When prompted, press Windows + G keys to open the Game bar on your computer. Note: You can also switch ON Game Mode by pressing the Xbox button on your controller.
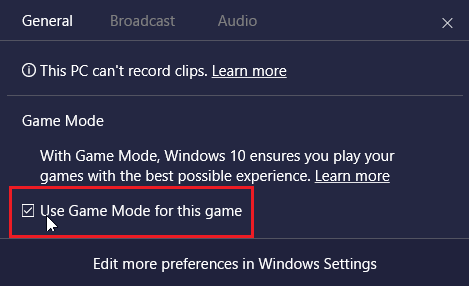
On the Game bar, click on the Settings icon located at the far right corner.
In the dialog box that appears, check Use Game Mode for this game option.
This will activate Game Mode on your computer while playing this particular Game, allowing you to experience enhanced frame rates and improved Game play.
How to Record Gameplay in Windows 10 How to Disable Game DVR in Windows 10

![]()


![]()
