High Memory and CPU Usage by Microsoft Teams
By default, Microsoft Teams tends to start up automatically with the computer and remains active in background, ready and waiting to be used. While it is being actively used, Microsoft Teams tries to utilize all the available resources on the computer, in an effort to bring you the best possible video streams. However, this behavior can sometimes lead to High Memory, CPU and Battery usage in Windows 10, especially on budget computers with low RAM and CPU capacity.
1. Sign Out from Microsoft Teams
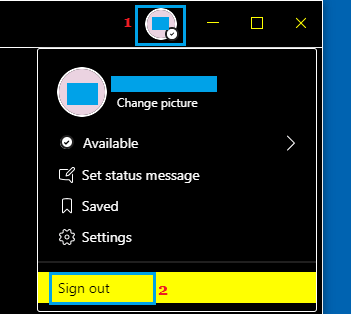
If you are not using Microsoft Teams, you cam simply Sign Out of the program and it will stop using Resources on your computer. Open Microsoft Teams (if it is not already open) > click on your Profile Icon and select the Sign Out option in drop-down menu.
Note: You can also exit Teams by right-clicking on the Teams Icon in Taskbar and clicking on the Sign-out option.
2. Disable GPU Hardware Acceleration
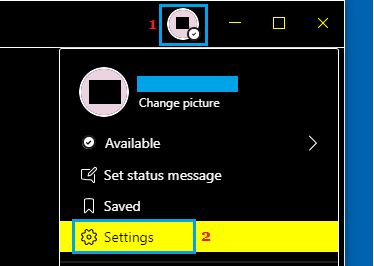
Open Microsoft Teams, click on your Profile Icon and select Settings in the Drop-down menu.
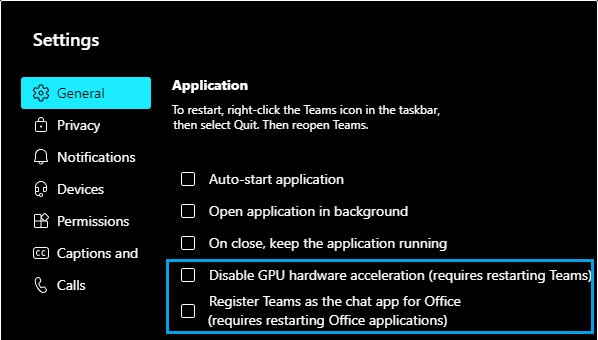
On the Settings screen, select the General Tab and uncheck Disable GPU Hardware Acceleration and Register Teams as the Chat App for Office options.
Exit Microsoft Teams and relaunch it back on your computer.
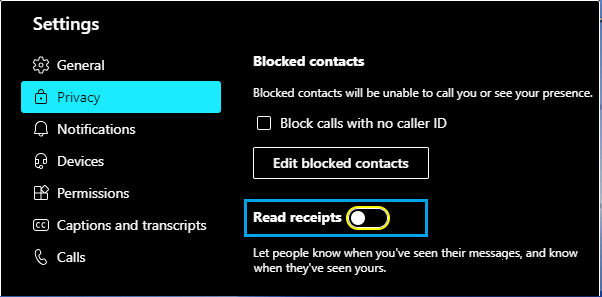
3. Turn OFF Read Receipts
Open Microsoft Teams, click on your Profile Icon and select Settings in the Drop-down menu.
On the Settings screen, select the Privacy tab and move the toggle next to Read Receipts to OFF position.
Exit Teams and relaunch it back on your computer.
4. Disable Microsoft Outlook Add-in
Open Microsoft Outlook on your computer > click on the Gear Icon and select Options in the drop-down menu.
On the Options screen, select the Add-ins tab in left-pane. In the right-pane, uncheck Microsoft Teams Meeting Add-in for Microsoft Office and TeamViewer Meeting Add-in.
5. Adjust Visual Effects for Best Performance
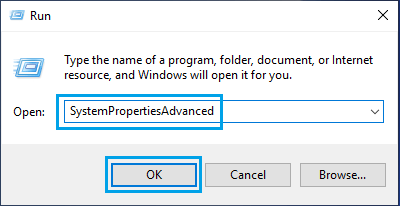
Setting Visual Effects for best performance (instead of best appearance) can help in reducing the GPU load on your computer. Right-click on the Start button and click on Run > type SystemPropertiesAdvanced in Run Command window and click on OK.
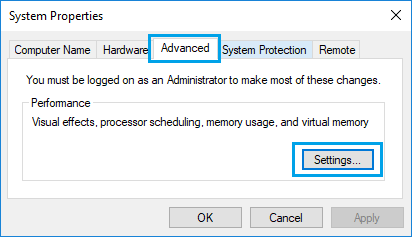
On the next screen, select the Advanced tab and click on Settings button under “Performance” section.
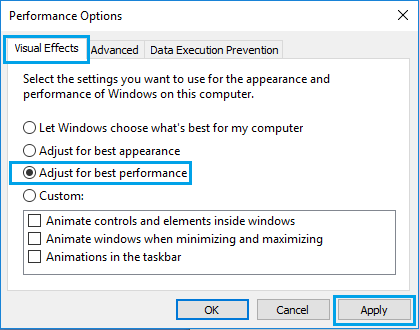
On the next screen, click on Visual Effects tab and select Adjust for best performance option.
Click on Apply > OK to save these settings on your computer.
6. Increase Virtual Memory
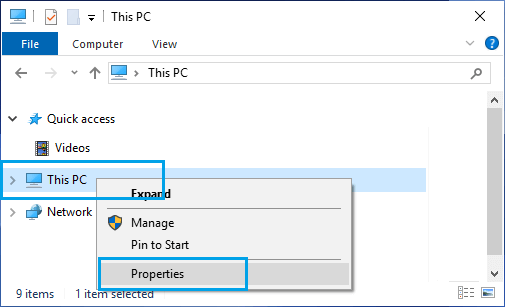
Increasing Virtual Memory allows your computer to make use of Virtual memory (paging file), whenever there is a shortage of RAM on your computer. Open File Explorer > right-click on This PC and click on Properties.
On the System screen, click on Advanced system settings link located under “Related Settings” section. On the next screen, switch to t Advanced tab and click on Settings button under Performance section.
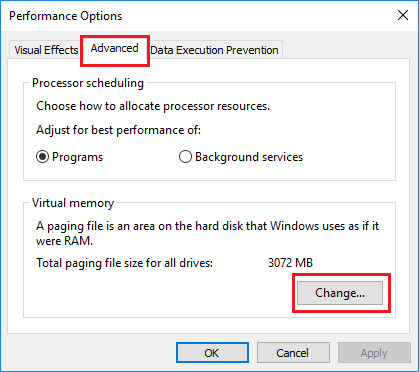
On the next screen, switch to Advanced tab and click on the Change button located under Virtual Memory section.
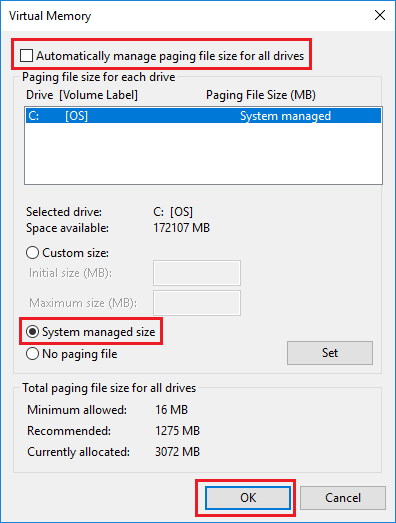
On Virtual Memory screen, uncheck Automatically manage option, select your Hard Drive and select System Managed size and click on OK.
Restart the computer for above changes to be implemented.
7. Clear Teams Cache
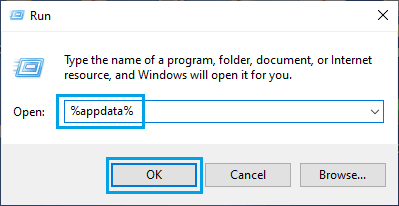
Right-click on the Start button and click on Run > type %appdata% in Run Command window and click on OK.
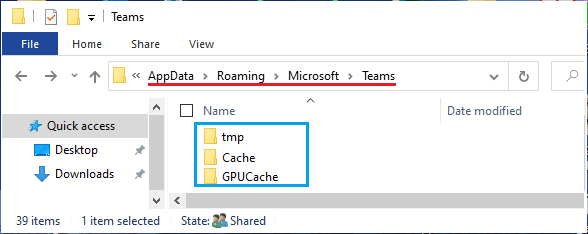
Navigate to AppData\Roaming\Microsoft\Teams > Open Teams Folder and delete all files in tmp, Cache and GPUCache Folders.
After these changes, you should find Microsoft Teams running faster and consuming less Memory and CPU on your computer.
How to See Everyone in Microsoft Teams Meeting Stop Microsoft Teams from Running in Background

![]()
